Ad 728x90

Tuesday, 31 July 2018

How To Install A Blogger Template

How To Install A Blogger Template

How To Install A Blogger Template


Welcome to our template installation guide, we have tried to cover every single detail to ensure that you will not face any kind of difficulty, while installing our template.
Follow this simple guide to install your Favorite Blogger Template. Lets Proceed

Step - 1 ( Downloading The Template)

Search for the template you want in soratemplates.com and then choose one which suits your blog niche, we have covered a lot of blogger template for almost every niche, now Click on to the “Download button” and save file in your hard drive.

Step - 2 ( Extracting The Folder )

We compress the template folder to maintain the file size you have to unzip it so that you can access the template, to Unzip Just Right click on the file and select "Extract". or else use third party software's like Winrar and 7zip.  

Step - 3 ( The Login Process )

Visit - Blogger.com and Log in to your blogger account.

Setup - 4 ( Choose The Blog )

Find the blog where you want to install the template, Now to install the template on your desired blog select "Template" Option from the dropdown.

Step - 5 ( Let's Backup And Install )

Just go to the top right corner of your screen, there you will see Backup / Restore button, Click that button.
A pop up will appear and you will see two options, click the "Download template" button to backup your previous template.
Note: - " Before doing this, Please backup your previous template because, if you have any problem after uploading the new template, the backup file will help you for restore. "
Now you lets proceed to the final and most important step which is installing.
To Install the template click on "Choose file" Button and search for the folder where you have extracted your template file.
After looking for the desired folder just select the .xml file and click upload button. ( Folder may has a .XML file and .TXT file or Internet shortcuts, you should select only XML file. )  

Tuesday, 19 June 2018

10 Ways To Free Up Disk Space on Your Mac Hard Drive

10 Ways To Free Up Disk Space on Your Mac Hard Drive


Your Disk is Almost Full


Even in 2018, MacBooks still have tiny hard drives that fill up quickly. Luckily there are quick and easy ways to free up space on your hard drive. Here’s how to clean up your Mac and reclaim some drive space.

You can obviously free up disk space by simply doing a cursory find-and-delete for big files and other things that you’ve downloaded, but realistically that’s only going to get you so far. Most of the wasted space on your Mac is only going to be reclaimed if you look at lot deeper—cleaning out language files, removing duplicate files, deleting attachments, clearing temporary files, or emptying all of the Trash cans.

If you fail to keep your Mac’s hard drive clean, you’re eventually going to get the dreaded “Your disk is almost full” error, so you may as well start now and clear up some space.
How to Clean Up Your Mac the Easy Way

If you don’t feel like spending a bunch of time to find and clean things up manually, you can use CleanMyMac 3 to get rid of temporary files, clean up extra language files, uninstall applications, get rid of extra files left behind by application uninstallations, find and get rid of big attachments stored in Mail, and a whole lot more.

It basically has all the features of the cleaning applications we talk about in this article, but in a single app—with the exception of finding duplicate files, which you’ll still want to use Gemini 2 for. Luckily it’s the same vendor that makes Gemini 2 and you can get them both as a bundle.

And of course, there’s a free trial that shows where your free space has gone and lets you clean up some of it for free.


CleanMyMac

 ote: before running any cleaning tool, you should make sure that all of your important data is backed up, just in case.
Find and Remove Duplicate Files

One of the trickiest things that can take up lots of drive space are duplicate files littering up your computer—this is especially true if you’ve been using the computer for a long time. Luckily there are great apps like Gemini 2 that can be used to find and remove duplicate files with a really slick and easy interface.

You can buy it on the App Store if you want — Apple had this one as their Editors’ Choice, but you’re probably better off getting it from their website, because they have a free trial available there.

free trial available there.

There are a lot of other choices on the App Store and elsewhere, but we’ve used this one and had good results.

Empty Your Trash Cans

The Trash on a Mac is equivalent to the Recycle Bin on Windows. Rather than permanently deleting files from within the Finder, they are sent to your Trash so you can restore them later if you change your mind. To completely remove these files and free up the space they require, you’ll have to empty your Trash. But Macs can actually have multiple trash cans, so you may need to empty several.
To empty your user account’s main trash can, Ctrl-click or right-click the Trash icon at the bottom-right corner of the dock and select Empty Trash. This will delete all the files you sent to the trash from the Finder.

iPhoto, iMovie, and Mail all have their own trash cans. If you’ve deleted media files from within these applications, you’ll need to empty their trash cans, too. For example, if you use iPhoto to manage your pictures and delete them in iPhoto, you’ll have to clear the iPhoto trash to remove them from your hard drive. To do this, just Ctrl+click or right-click the Trash option in that specific application and select Empty Trash.
empty-delete-photos-from-iphoto-trash

Uninstall Applications You Don’t Use

The applications you have installed on your Mac are taking up space, of course. You should uninstall them if you don’t need them—just open a Finder window, select Applications in the sidebar, and drag-and-drop the application’s icon to the trash can on your dock. Some of these applications can be taking up a ton of space.
To find out which applications are using up the most space, open a Finder window and select Applications. Click the “Show items in a list” icon on the toolbar and then click the Size heading to sort your installed applications by size.
view-size-of-installed-applications-on-mac

Clean Up the Huge iTunes Backups of Your iPhone or iPad

If you’ve backed up your iPhone or iPad to your Mac using iTunes, you’ve probably got a bunch of massive backup files that are taking up a shocking amount of space. We were able to clear up over 200 GB of space by finding and deleting some of these backup files.

To delete them manually, you can open up the following path to see the backup folders, which will have random names, and you can delete the folders found inside. You’ll probably want to close iTunes before you do that.
 ~/Library/Application Support/MobileSync/Backup
The easier (and much safer) way to delete them is to use CleanMyMac, which translates those confusing folders into actual backup names so you can decide which backup you actually want to delete. Just check the things you want to remove, and then click the Clean button.

Clear Out Temporary Files

Your Mac’s hard drive probably has temporary files you don’t need. These files often take up disk space for no good reason. Mac OS X tries to automatically remove temporary files, but a dedicated application will likely find more files to clean up. Cleaning temporary files won’t necessarily speed up your Mac, but it will free up some of that precious disk space.
Your web browser has a built-in option to clear out browsing data that you can use to quickly clear up a bit of space—but it’s not necessarily a great idea. These caches contain files from web pages so your browser can load the web pages faster in the future. Your web browser will automatically start rebuilding the cache as you browse, and it will just slow down web page load times as your browser’s cache grows again. Each browser limits its cache to a maximum amount of disk space, anyway.

There are a lot of other temporary files on your system, which you can see by opening up Finder, using Go -> Go to Folder on the menu, and using ~/Library/Caches to get to the cache folder. This will pull up a folder that has a ton of folders in it, which you can select and delete manually if you choose.

You can clean up temporary files easier, and much safer, by using CleanMyMac. Just open it up and run through a scan, and then go into the System Junk section to identify all of the cache files and other things that you can clean up. Once you’ve selected what you want or don’t want to clean, just click the Clean button.
One of the things that makes a utility like CleanMyMac so great is that it converts a lot of those confusing folder names into the names of the actual applications, so you can see which temporary files you’re actually deleting.

The thing about temporary files, of course, is that most of them are going to come back after you use your Mac for a while. So deleting temporary files is great, but only works for a while.

Check Your Disk to See What is Taking Up Space and Find Large Files

To free up disk space, it’s helpful to know exactly what is using disk space on your Mac. A hard disk analysis tool like Disk Inventory X will scan your Mac’s hard disk and display which folders and files are using up the most space. You can then delete these space hogs to free up space.
If you care about these files, you may want to move them to external media — for example, if you have large video files, you may want to store them on an external hard drive rather than on your Mac.
Bear in mind that you don’t want to delete any important system files. Your personal files are located under /Users/name, and these are the files you’ll want to focus on.
analyze-disk-space-used-by-files-on-mac-os-x

Remove Language Files

Mac applications come with language files for every language they support. You can switch your Mac’s system language and start using the applications in that language immediately. However, you probably just use a single language on your Mac, so those language files are just using hundreds of megabytes of space for no good reason. If you’re trying to squeeze as many files as you can onto that 64 GB MacBook Air, that extra storage space can be useful.
To remove the extra language files, you can use CleanMyMac, as we’ve mentioned earlier (It’s under System Junk -> Language Files). There’s also another tool called Monolingual that can delete these as well, though it’s yet another tool to download for a very specific use. Removing language files is only necessary if you really want the space—those language files aren’t slowing you down, so keeping them is no problem if you have a big hard disk with more than enough free space.
remove-language-files-with-monolingual-on-a-mac

Clean Up Big Attachments in Mac Mail

If you’re using the built-in Mail application in macOS and you’ve had the same email account for a long time, there’s a good chance that large email attachments are taking up a ton of space on your drive—sometimes many gigabytes worth, so this is a good place to check while cleaning up your drive.
RELATED: How to Stop Your Mac’s Mail App From Wasting Gigabytes of Space
You can change the Mail settings to not download attachments automatically to save space, or run a cleanup tool to get rid of them. If you’re using Gmail, you can set limits on how many messages are synced over IMAP by default to only show the last few thousand instead of everything. Go into Mail -> Preferences -> Accounts -> Account Information and change the drop-down for “Download attachments” to either “Recent” or “None”.

Changing this setting will help Mail not use up as much space going forward, but it doesn’t solve the problem of attachments from emails that have already been downloaded.
If you want to remove those attachments, you’re going to need to follow a very annoying manual process:
  1. Open up Mail, and click on the folder that you want to find and remove attachments for.
  2. Use the Sort by Size option to find the biggest messages.
  3. Click on the message, and choose Message -> Remove Attachments from the menu bar. This won’t delete the attachment from the mail server if you’re using IMAP.
  4. Repeat for all the messages that you want to delete attachments for.
Note: if you are using POP for your email, do not delete attachments unless you really don’t want them anymore, because they will be gone forever otherwise. If you’re using IMAP, which any modern email like Gmail, Yahoo, or Hotmail would be using, the messages and attachments will stay on the server.
Cleaning Up Email Attachments the Easy Way
If you want to clean up and delete old attachments automatically, there’s only one good solution that we know of, and that’s CleanMyMac. You can run a scan, head to Mail Attachments, and see all of the attachments that can be deleted. Click Clean, and your hard drive will be free of them. Those attachments will still be on your email server, assuming you’re using IMAP, so you can delete everything without worrying too much.
If you’re worried, you can also uncheck the box next to “All Files” and then manually select all of the files that you want to delete.

Clean Up Your Downloads Folder


This tip is so obvious that you’d think we don’t need to include it, but it’s something that everybody forgets to deal with—your Downloads folder is so often full of huge files that you don’t need, and it’s not something you think about.
Just open up Finder and head into your Downloads folder and start deleting everything you don’t need. You can sort by file size to quickly delete the biggest offenders, but don’t forget to look at the folders—remember that every time you open up an archive file, it automatically unzips into a folder. And those folders sit there looking innocuous but taking up tons of space on your drive.

Use the Storage Tools in macOS High Sierra

The latest version of macOS Sierra has a new tool to help you clean the junk out of your Mac — just go to the menu and choose “About This Mac” and then flip over to the Storage tab.
About_This_Mac
Once you are there, you can go through the new settings and enable the ones that make sense to you.
  • Store in iCloud – this new feature allows you to store your Desktop, Documents, Photos, and videos in iCloud and Apple will automatically free up local space as needed. If you’re on a slow internet connection, you probably don’t want to enable this.
  • Optimize Storage – the name doesn’t really match the feature, which basically deletes purchased iTunes movies and TV shows after you’ve watched them to keep them from cluttering up your drive. Since movies, especially in HD format, are extremely large files, this can help keep your Mac from running out of space. You can, of course, download them again any time if you’ve purchased them.
  • Empty Trash Automatically – this is fairly simple, if you turn this on Apple will automatically delete old items out of the trash after they have been in there for 30 days.
  • Reduce Clutter – this will help you find the biggest files on your hard drive and delete them.

It’s a little clunky and not as easy to use as some of the third-party tools, but it does work.

Monday, 11 June 2018

How to See Which Apps Are Draining Your Battery on an Android Phone or Tablet

How to See Which Apps Are Draining Your Battery on an Android Phone or Tablet

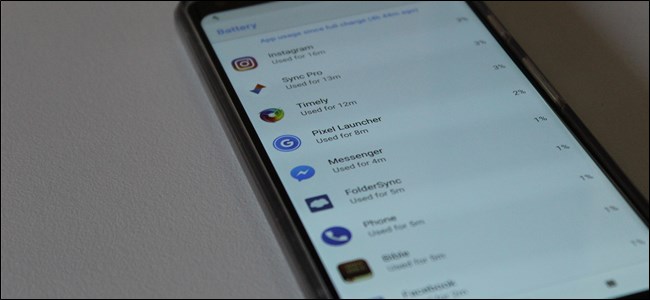
If your Android phone’s battery always feels a little low, you can find out exactly where that power is going. Android’s Battery screen shows you what’s used battery power since your last charge, from apps to system services and hardware devices.

How to Access the Battery Screen

Open the Settings app from your app drawer, expand the “Device” section, and then tap the “Battery” option.
You can also pull down the Quick Settings panel in the notifications shade and long-press the battery icon (or Battery Saver on Oreo devices) to go straight to this screen.
The Battery screen only shows battery usage since the last full charge. If you’ve just recently charged your phone or tablet, it won’t be very helpful. Ideally, you’ll want to check this screen when your device is fairly low on battery to get an idea of what apps, hardware components, and system services actually used battery power since your last charge.
On older versions of Android (Nougat and earlier), you’ll get a chart with battery discharge information, and just below that a look at what’s eating up the battery. On Oreo and above, several battery settings appear above the list, so you’ll need to scroll down to see it.
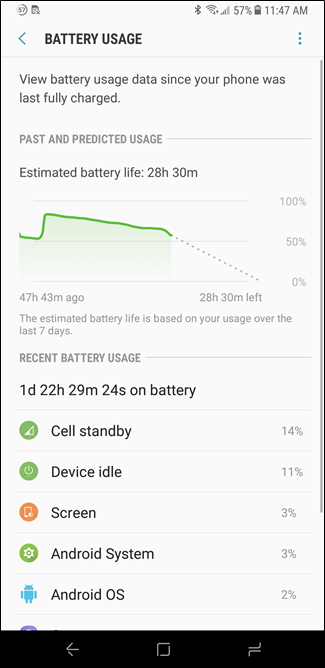
On Samsung devices, you’ll need to tap the “Battery Usage” button in the battery menu to get a look at this list.
 
Assuming your device has been running for long enough, you’ll get a good look at exactly what drained battery power and when it happened. You can tap an app or service to view more detailed information.
 

Get More Advanced Battery Stats with Third-Party Apps

Android actually collects a lot more battery usage information than it displays on the Battery settings screen. Previously, it was possible for an app like Better Battery Stats to request the BATTERY_STATS permission and access this information. You could then view more detailed battery statistics. For example, you could view information about wakelocks, or view battery usage for periods of time not displayed in the Battery screen.
Unfortunately, Google removed this permission from Android and apps can no longer view it. If you’ve rooted your Android device, you can still install an app like Better Battery Stats to view more detailed information on battery usage. But without rooting, you’re stuck with the information provided by Android’s built-in Battery screen because these apps just can’t see that data.
That said, there are still a few ways you can get more meaningful battery stats on Android. Our preferred app for getting detailed information about your battery (without rooting) is AccuBattery, which not only gives more insight into which apps are using the most battery, but also provides a detailed look into your battery health. This is one of those apps that gets better and more useful as time goes on, so the more you use it, the more you’ll love it.
 

What Are All These Hardware and System Services?

On Android Nougat and below, hardware and operating system information shows up in this list alongside any apps that are using up battery life. On Oreo, however, this extra info is separated by default. To find it, you need to tap the menu button in the upper right corner, and then select the “Show full device usage” option. This lets you see the hardware components and OS services using up battery—just keep in mind this is a separate list, and won’t include any apps that are using battery!
 
You can get more information about a hardware component or service by tapping it. Apps are self-explanatory—they use battery power when you have them open, and some may also use up battery when running in the background. Here’s what all the non-app items in the list are:
  • Screen: This is the amount of power used by the screen and its backlight. Your screen always uses a significant amount of power. You can reduce the usage a bit by lowering your screen brightness and configuring Android to turn the screen off when you’re not using it.
  • Wi-Fi: This shows amount of power used by your device’s Wi-Fi radio. It always uses some amount of power when you’re connected to Wi-Fi, and even when you’re not connected as it searches for available connections. You could save some power by disabling WI-Fi when you’re not using a Wi-Fi network.

  • Cell Standby: Assuming you’re using a device with a cellular connection, that cellular radio is always using some power. If you have a weak cellular signal, this could result in higher power usage.
  • Android OS: This accounts for all the battery power used by the underlying Android operating system, which manages your running processes, interfaces with your hardware, and does all that low-level stuff.
  • Android System: Despite the name, this is separate from the Android operating system itself. It represents the battery power used by things like the Settings app, input devices, and various other system services. You could make it use a bit less battery power by enabling battery saver mode.
  • Google Play Services: This includes a variety of services, including Google Play Services, the Google account manager, Google services framework, and Google backup transport. This is just another package of services used by your Android device. Battery saver mode can reduce power used by these background processes, too.
  • Phone idle or Tablet idle: Your Android device uses some amount of power just because it’s on, even if it’s completely idle in a low-power state.
  • Users: If you have multiple user accounts set up on your Android phone or tablet, you’ll see a separate “User” item for each user here. This helps you understand how much other user accounts contributed to your battery usage.

How to Save Battery on Your Android Phone

You probably already know that you can lower your screen brightness and disable Wi-Fi and Bluetooth when you aren’t using them, but there’s a lot more you can do beyond those simple tricks.
If the Battery screen shows that an app is using a lot of battery power, you may want to remove or replace it. Apps definitely appear on your Battery screen if you actually use them, but some apps are heavier power users than others—for example, a demanding 3D game uses more battery power than the average app. Some apps also run in the background and use power even when you aren’t actively using them.  It’s not possible to entirely prevent apps from running in the background, but you may be able to disable background operations within an app’s settings. If not, you could uninstall or disable the app, and use an alternative. For example, instead of the power-hungry Facebook app, you could use Facebook’s battery-friendly mobile site.
If your phone is running Android Oreo, it will let you know when an app is running in the background and using up battery. If you don’t like this feature, you can disable it pretty easily, but it can also be quite handy for keeping an eye on apps that become unruly.
Other Android features can also help you save power. Battery saver mode puts your device into a more conservative state where less background work will be allowed, and you can have your phone automatically enable it for you. Doze helps save power when you aren’t using your phone or moving it around, and you can make Doze even more powerful.

The Battery screen show you where your battery power went, but it’s up to you to do something with that information. It’s a good starting point when you want to start saving battery power, but Google has unfortunately limited access to more detailed battery usage information. Still, the included Battery screen should be more than enough information for Android users who aren’t geeks. It’s just be nice to have access to information from more time periods, especially if you’ve recently charged your device. For example, battery usage data from the last 24 hours would be helpful.
Similar features are available on Microsoft’s Windows 10, Apple’s iPhones and iPads, and Mac OS X. You can see exactly what’s been using battery power and make informed decisions to help prolong your battery life.

Friday, 1 June 2018

COMPUTER OUTPUT DEVICES

COMPUTER OUTPUT DEVICES

Following are some of the important output devices used in a computer.
  • Monitors
  • Graphic Plotter
  • Printer

Monitors

Monitors, commonly called as Visual Display Unit (VDU), are the main output device of a computer. It forms images from tiny dots, called pixels that are arranged in a rectangular form. The sharpness of the image depends upon the number of pixels.
There are two kinds of viewing screen used for monitors.
  • Cathode-Ray Tube (CRT)
  • Flat-Panel Display

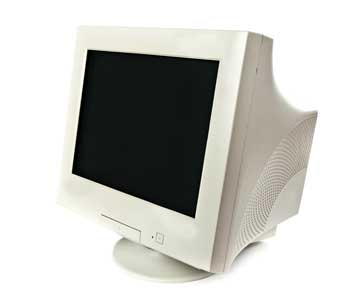
Cathode-Ray Tube (CRT) Monitor

The CRT display is made up of small picture elements called pixels. The smaller the pixels, the better the image clarity or resolution. It takes more than one illuminated pixel to form a whole character, such as the letter ‘e’ in the word help.
CRT Monitor
A finite number of characters can be displayed on a screen at once. The screen can be divided into a series of character boxes - fixed location on the screen where a standard character can be placed. Most screens are capable of displaying 80 characters of data horizontally and 25 lines vertically.
There are some disadvantages of CRT −
  • Large in Size
  • High power consumption

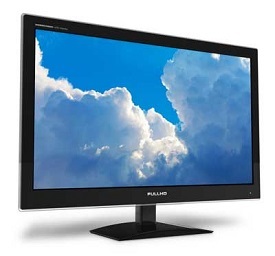
Flat-Panel Display Monitor

The flat-panel display refers to a class of video devices that have reduced volume, weight and power requirement in comparison to the CRT. You can hang them on walls or wear them on your wrists. Current uses of flat-panel displays include calculators, video games, monitors, laptop computer, and graphics display.
Flat Monitor
The flat-panel display is divided into two categories −
  • Emissive Displays − Emissive displays are devices that convert electrical energy into light. For example, plasma panel and LED (Light-Emitting Diodes).
  • Non-Emissive Displays − Non-emissive displays use optical effects to convert sunlight or light from some other source into graphics patterns. For example, LCD (Liquid-Crystal Device).

Printers

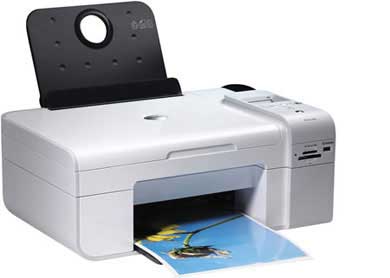
Printer is an output device, which is used to print information on paper.
There are two types of printers −
  • Impact Printers
  • Non-Impact Printers

Impact Printers

Impact printers print the characters by striking them on the ribbon, which is then pressed on the paper.
Characteristics of Impact Printers are the following −
  • Very low consumable costs
  • Very noisy
  • Useful for bulk printing due to low cost
  • There is physical contact with the paper to produce an image
These printers are of two types −
  • Character printers
  • Line printers
Character Printers
Character printers are the printers which print one character at a time.
These are further divided into two types:
  • Dot Matrix Printer(DMP)
  • Daisy Wheel
Dot Matrix Printer
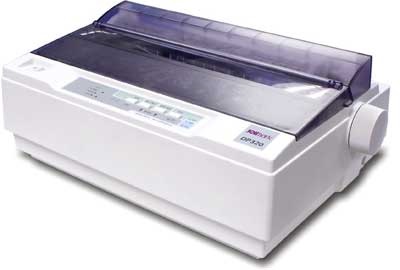
In the market, one of the most popular printers is Dot Matrix Printer. These printers are popular because of their ease of printing and economical price. Each character printed is in the form of pattern of dots and head consists of a Matrix of Pins of size (5*7, 7*9, 9*7 or 9*9) which come out to form a character which is why it is called Dot Matrix Printer.
Dot Matrix Printer
Advantages
  • Inexpensive
  • Widely Used
  • Other language characters can be printed
Disadvantages
  • Slow Speed
  • Poor Quality
Daisy Wheel
Head is lying on a wheel and pins corresponding to characters are like petals of Daisy (flower) which is why it is called Daisy Wheel Printer. These printers are generally used for word-processing in offices that require a few letters to be sent here and there with very nice quality.
Daisy Wheel Printer
Advantages
  • More reliable than DMP
  • Better quality
  • Fonts of character can be easily changed
Disadvantages
  • Slower than DMP
  • Noisy
  • More expensive than DMP
Line Printers
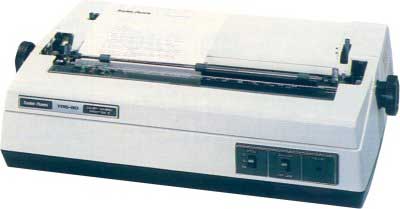
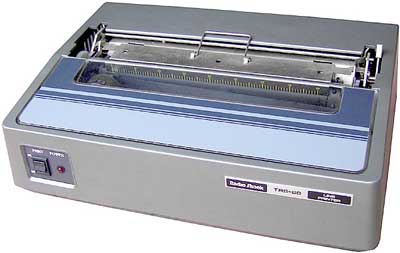
Line printers are the printers which print one line at a time.
Line Printer
These are of two types −
  • Drum Printer
  • Chain Printer
Drum Printer
This printer is like a drum in shape hence it is called drum printer. The surface of the drum is divided into a number of tracks. Total tracks are equal to the size of the paper, i.e. for a paper width of 132 characters, drum will have 132 tracks. A character set is embossed on the track. Different character sets available in the market are 48 character set, 64 and 96 characters set. One rotation of drum prints one line. Drum printers are fast in speed and can print 300 to 2000 lines per minute.
Advantages
  • Very high speed
Disadvantages
  • Very expensive
  • Characters fonts cannot be changed
Chain Printer
In this printer, a chain of character sets is used, hence it is called Chain Printer. A standard character set may have 48, 64, or 96 characters.
Advantages
  • Character fonts can easily be changed.
  • Different languages can be used with the same printer.
Disadvantages
  • Noisy

Non-impact Printers

Non-impact printers print the characters without using the ribbon. These printers print a complete page at a time, thus they are also called as Page Printers.
These printers are of two types −
  • Laser Printers
  • Inkjet Printers
Characteristics of Non-impact Printers
  • Faster than impact printers
  • They are not noisy
  • High quality
  • Supports many fonts and different character size
Laser Printers
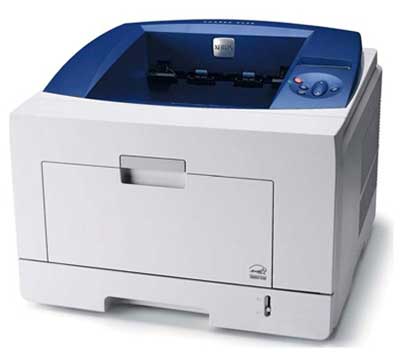
These are non-impact page printers. They use laser lights to produce the dots needed to form the characters to be printed on a page.
Laser Printer
Advantages
  • Very high speed
  • Very high quality output
  • Good graphics quality
  • Supports many fonts and different character size
Disadvantages
  • Expensive
  • Cannot be used to produce multiple copies of a document in a single printing
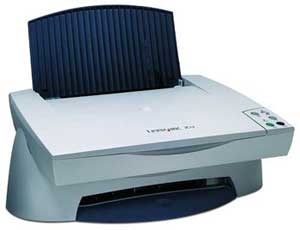
Inkjet Printers
Inkjet printers are non-impact character printers based on a relatively new technology. They print characters by spraying small drops of ink onto paper. Inkjet printers produce high quality output with presentable features.
Inkjet Printer
They make less noise because no hammering is done and these have many styles of printing modes available. Color printing is also possible. Some models of Inkjet printers can produce multiple copies of printing also.
Advantages
  • High quality printing
  • More reliable
Disadvantages

  • Expensive as the cost per page is high
  • Slow as compared to laser printer
COMPUTER INPUT DEVICE, ALL KINDS OF COMPUTER INPUT DEVICE

COMPUTER INPUT DEVICE, ALL KINDS OF COMPUTER INPUT DEVICE

Following are some of the important input devices which are used in a computer −
  • Keyboard
  • Mouse
  • Joy Stick
  • Light pen
  • Track Ball
  • Scanner
  • Graphic Tablet
  • Microphone
  • Magnetic Ink Card Reader(MICR)
  • Optical Character Reader(OCR)
  • Bar Code Reader
  • Optical Mark Reader(OMR)

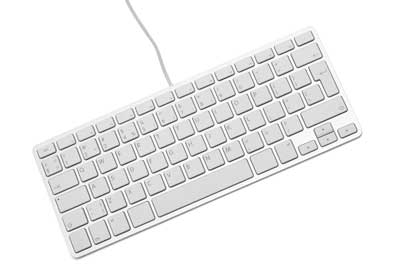
Keyboard

Keyboard is the most common and very popular input device which helps to input data to the computer. The layout of the keyboard is like that of traditional typewriter, although there are some additional keys provided for performing additional functions.
Keyboard
Keyboards are of two sizes 84 keys or 101/102 keys, but now keyboards with 104 keys or 108 keys are also available for Windows and Internet.
The keys on the keyboard are as follows −
S.No Keys & Description
1 Typing Keys
These keys include the letter keys (A-Z) and digit keys (09) which generally give the same layout as that of typewriters.
2 Numeric Keypad
It is used to enter the numeric data or cursor movement. Generally, it consists of a set of 17 keys that are laid out in the same configuration used by most adding machines and calculators.
3 Function Keys
The twelve function keys are present on the keyboard which are arranged in a row at the top of the keyboard. Each function key has a unique meaning and is used for some specific purpose.
4 Control keys
These keys provide cursor and screen control. It includes four directional arrow keys. Control keys also include Home, End, Insert, Delete, Page Up, Page Down, Control(Ctrl), Alternate(Alt), Escape(Esc).
5 Special Purpose Keys
Keyboard also contains some special purpose keys such as Enter, Shift, Caps Lock, Num Lock, Space bar, Tab, and Print Screen.

Mouse

Mouse is the most popular pointing device. It is a very famous cursor-control device having a small palm size box with a round ball at its base, which senses the movement of the mouse and sends corresponding signals to the CPU when the mouse buttons are pressed.
Generally, it has two buttons called the left and the right button and a wheel is present between the buttons. A mouse can be used to control the position of the cursor on the screen, but it cannot be used to enter text into the computer.
Mouse

Advantages

  • Easy to use
  • Not very expensive
  • Moves the cursor faster than the arrow keys of the keyboard.

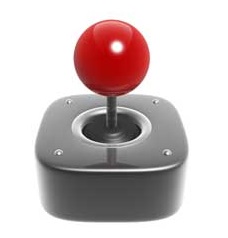
Joystick

Joystick is also a pointing device, which is used to move the cursor position on a monitor screen. It is a stick having a spherical ball at its both lower and upper ends. The lower spherical ball moves in a socket. The joystick can be moved in all four directions.
Joystick
The function of the joystick is similar to that of a mouse. It is mainly used in Computer Aided Designing (CAD) and playing computer games.

Light Pen

Light pen is a pointing device similar to a pen. It is used to select a displayed menu item or draw pictures on the monitor screen. It consists of a photocell and an optical system placed in a small tube.
Light Pen
When the tip of a light pen is moved over the monitor screen and the pen button is pressed, its photocell sensing element detects the screen location and sends the corresponding signal to the CPU.

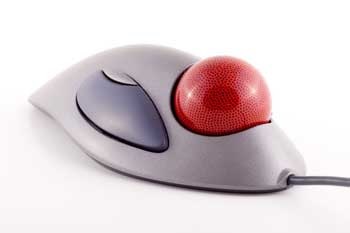
Track Ball

Track ball is an input device that is mostly used in notebook or laptop computer, instead of a mouse. This is a ball which is half inserted and by moving fingers on the ball, the pointer can be moved.
Track Ball
Since the whole device is not moved, a track ball requires less space than a mouse. A track ball comes in various shapes like a ball, a button, or a square.

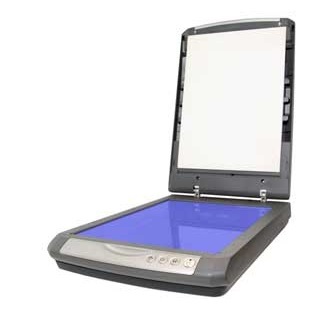
Scanner

Scanner is an input device, which works more like a photocopy machine. It is used when some information is available on paper and it is to be transferred to the hard disk of the computer for further manipulation.
Scanner
Scanner captures images from the source which are then converted into a digital form that can be stored on the disk. These images can be edited before they are printed.

Digitizer

Digitizer is an input device which converts analog information into digital form. Digitizer can convert a signal from the television or camera into a series of numbers that could be stored in a computer. They can be used by the computer to create a picture of whatever the camera had been pointed at.
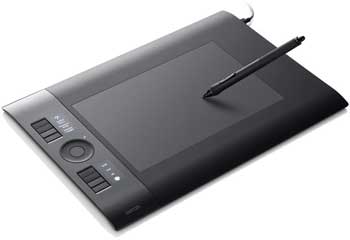
Graphic Tablet
Digitizer is also known as Tablet or Graphics Tablet as it converts graphics and pictorial data into binary inputs. A graphic tablet as digitizer is used for fine works of drawing and image manipulation applications.

Microphone

Microphone is an input device to input sound that is then stored in a digital form.
Microphone
The microphone is used for various applications such as adding sound to a multimedia presentation or for mixing music.

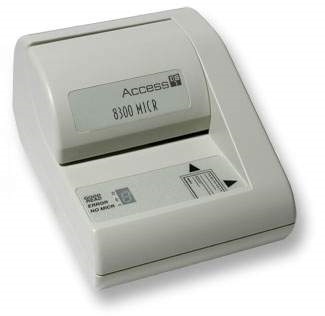
Magnetic Ink Card Reader (MICR)

MICR input device is generally used in banks as there are large number of cheques to be processed every day. The bank's code number and cheque number are printed on the cheques with a special type of ink that contains particles of magnetic material that are machine readable.
Magnetic Ink Card Reader(MICR)
This reading process is called Magnetic Ink Character Recognition (MICR). The main advantages of MICR is that it is fast and less error prone.

Optical Character Reader (OCR)

OCR is an input device used to read a printed text.
Optical Character Reader(OCR)
OCR scans the text optically, character by character, converts them into a machine readable code, and stores the text on the system memory.

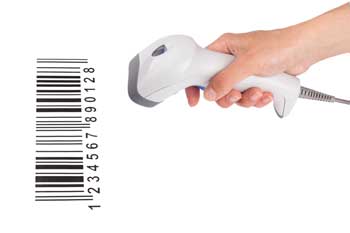
Bar Code Readers

Bar Code Reader is a device used for reading bar coded data (data in the form of light and dark lines). Bar coded data is generally used in labelling goods, numbering the books, etc. It may be a handheld scanner or may be embedded in a stationary scanner.
Barcode Reader
Bar Code Reader scans a bar code image, converts it into an alphanumeric value, which is then fed to the computer that the bar code reader is connected to.

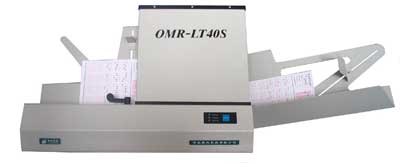
Optical Mark Reader (OMR)

OMR is a special type of optical scanner used to recognize the type of mark made by pen or pencil. It is used where one out of a few alternatives is to be selected and marked.
Optical Mark Reader(OMR)
It is specially used for checking the answer sheets of examinations having multiple choice questions.